
Most newcomers to race walking have no issue keeping one foot on the ground at all times, but they do struggle with swinging the legs through properly and mastering straightening of the knee. Therefore, given these challenges and that the definition of race walking only stipulates conditions on the legs and feet, Build a Race Walker focuses on the lower body in three phases.

The first 10% of the stride is most important. It’s what helps differentiate a race walker from a speed or health walker. It focuses on heel strike with the toe pointed up. We call it the Foot Plant drill and you must master it before progressing forward.
Steps
- Start by standing with your weight on your rear foot (Figure 3-3).
- Swing your other leg forward (Figure 3-4) from the knee until it fully extends.
- As you do, land with your foot slightly in front of the body, with your toes up and the knee straightened (Figure 3-5).
- Transfer all your weight to that leg (Figure 3-6).
- While virtually standing in place, rock back and forth from one foot to the other emphasizing the heel strike.
- Note that the knee does bend when you rock back.
- Repeat this exercise for both legs.


Next, we segue to the last 10% of the stride known as Push Off. This is a slow walking exercise.
- Start with your forward foot’s toes on the ground with forward leg’s knee straightened, and its heel planted on the ground; In addition, the rear leg is also straightened (Figure 3-7).
- Reach forward with the forward leg, land on your heel, with your toes pointed; simultaneously, push off the rear foot, lifting the heel off the ground (Figure 3-8).
- Unlike a race walking stride, place your rear foot back on the ground about 12 inches from where it toed off.
- Repeat this exercise with both legs.


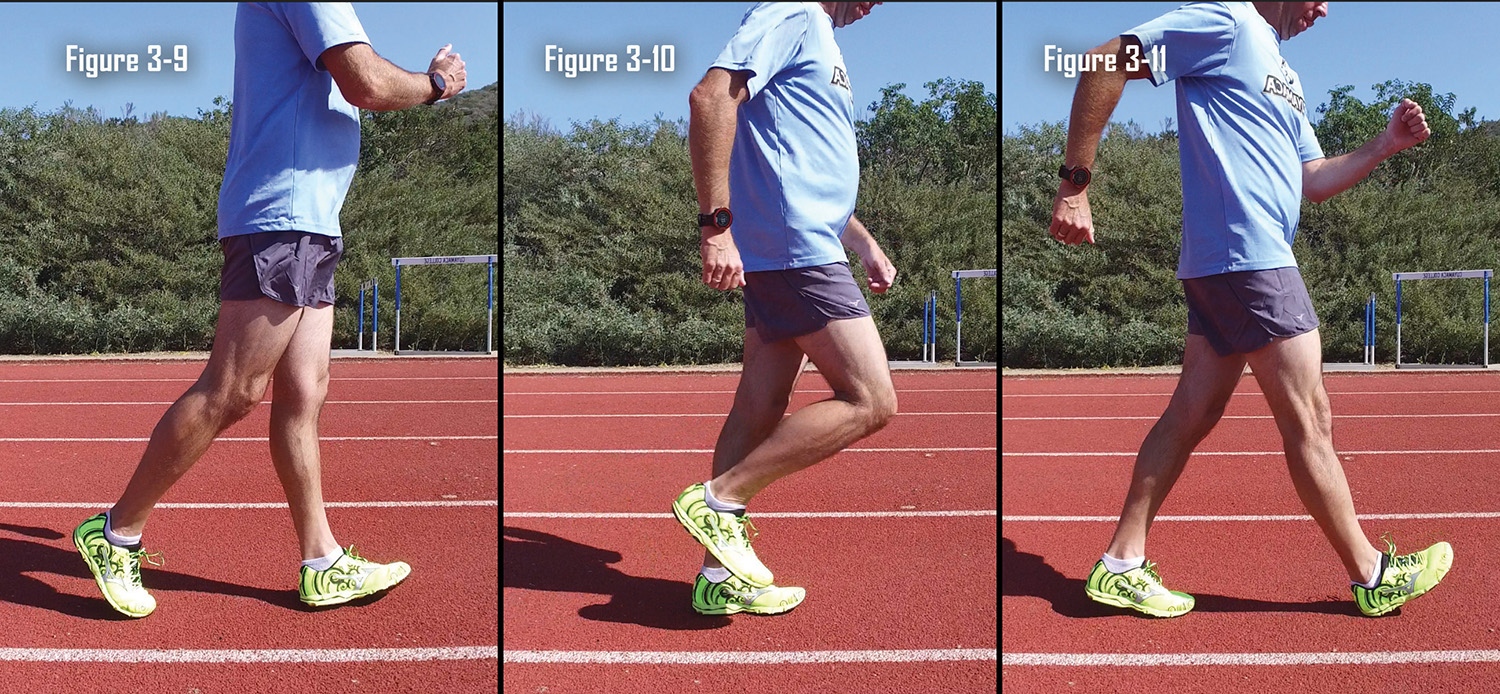
What’s left is what happens in the middle.
- Once you push off the rear foot (Figure 3-9), you must rapidly swing the leg forward into the attack position.
- Practice swinging the leg forward quickly (Figure 3-10), extending the knee fully, as fast as possible (Figure 3-11).
- As you swing the leg forward, focus on keeping the foot very low to the ground.
- Repeat this exercise with both legs.

Now that the lower body is set, let’s do a quick lesson on arms.
- Stand in place and swing your arms through the proper race walking motion with your hands swinging from your sternum all the way back behind your hips (Figure 3-11).
- When they do, focus on keeping the angle between the upper and lower arm to approximately 90 degrees and locked in place (Figure 3-12).
- Also, focus on relaxing the shoulders.

With these basic tutorials in place you are now ready to put them all together and race walk.